Building Custom ‘Lum Vs Sat’ Curves In Hsl Using Resolve’S Node Graph
Di: Ava
This is „Lum vs Sat Curves in Davinci Resolve“ by Subhe eLearning on Vimeo, the home for high quality videos and the people who love them.
The Lum Vs Sat curve increases or decreases saturation in different tonal areas of the image with a nice smooth falloff. For example, you can boost saturation in the midtones while reducing it in the shadows to add depth.
Join Patrick Inhofer for an in-depth discussion in this video, Using the Lum vs. and the Sat vs. curves, part of DaVinci Resolve 12 Essential Training. Colorist Cullen Kelly shares how to creatively manipulate color density in Hue vs. Lum adjustments while avoiding artifacts. Discover the power of Sat vs Lum for subtle contrast adjustments and targeted hue modifications through creative masking. This is
How to use CUSTOM CURVES in Davinci Resolve!
In this video, instructor Patrick Inhofer shows you how to work with sat and lum curves in Resolve to adjust saturation. Using the Lum vs. Sat curve, it’s easy to gradually desaturate everything below a certain range, with a nice smooth falloff. This is an outstanding curve to use for creative effect, for example, slightly boosting saturation within the midtones while reducing saturation in the shadows to increase the depth of the darkest portions of the image. It depends on the footage. If it’s is too compressed (for example drone or action cam), HSL or HSV tends to break it. In this case I use the classical Sat slider, but get some more Sat density where needed with the Sat-Sat and/or the Luma-Sat curve. In worst case scenarios, I correct it by hand with Hue-Sat curve, but I try not to overdo it. EDIT: After reading other comments, I
Sat vs Lum adjusts luminance: „The inverse of the Lum vs. Sat curve, Sat vs. Lum lets you quickly adjust the luminance of pixels that falls within a particular range of saturation. This is useful for cases where regions of the image you want to make lighter or darker happen to coincide with an identifiably consistent range of In this video, we go over the curves tool in Davinci Resolve and show you how this can really be a huge help in your color grading and creating the look for your project.
- Lum vs Sat Curves in Davinci Resolve
- How To Manipulate Hue More Effectively In DaVinci Resolve
- Vibrance vs Saturation in Color Grading: Key Differences
- Using the Lum vs. and the Sat vs. curves
In this episode we take an in depth look at the luminance vs saturation curve in the color tab of Davinci Resolve. Be sure to subscribe for more discussions, tutorials, tips, and tricks.
Chapter 132 Curves The Color page has a powerful curves interface that provides controls for adjusting color and contrast with the Custom Curves, as well as a variety of “Hue” or “HSL” curves that let you make more targeted adjustments to hue, saturation, and luminance in a variety of ways. Contents Introduction to Curves 2970 Adjusting Curves Using the Mouse 2970 Sampling The same happens on the Lum vs Sat and Sat vs Sat curves, even if less often. It would be very useful and time saving to copy and paste the curve from one curve mode to another. In this Video I go over how to use your CUSTOM CURVES in Davinci Resolve! This is definitely and area of the color page you want to understand. This area is praised for it’s flexibility of all
Unlike the Custom curves, which default to a diagonal position where lower left represents the black point and upper right represents the white point, Hue and Sat curves are flat. In the case of the Hue vs. Hue/Sat/Lum curves, the horizontal range of the curve from left to right represents the overall range of possible hues, from red through green through blue and then cycling back to red. Join Patrick Inhofer for an in-depth discussion in this video, Using the Hue vs. curves, part of DaVinci Resolve 12 Essential Training. DaVinci Resolve color grading is the creative process of altering the overall look and feel of your video footage to evoke specific emotions or styles. Color correction, on the other hand, is about fixing technical issues like white balance or exposure to make the footage look natural and consistent.

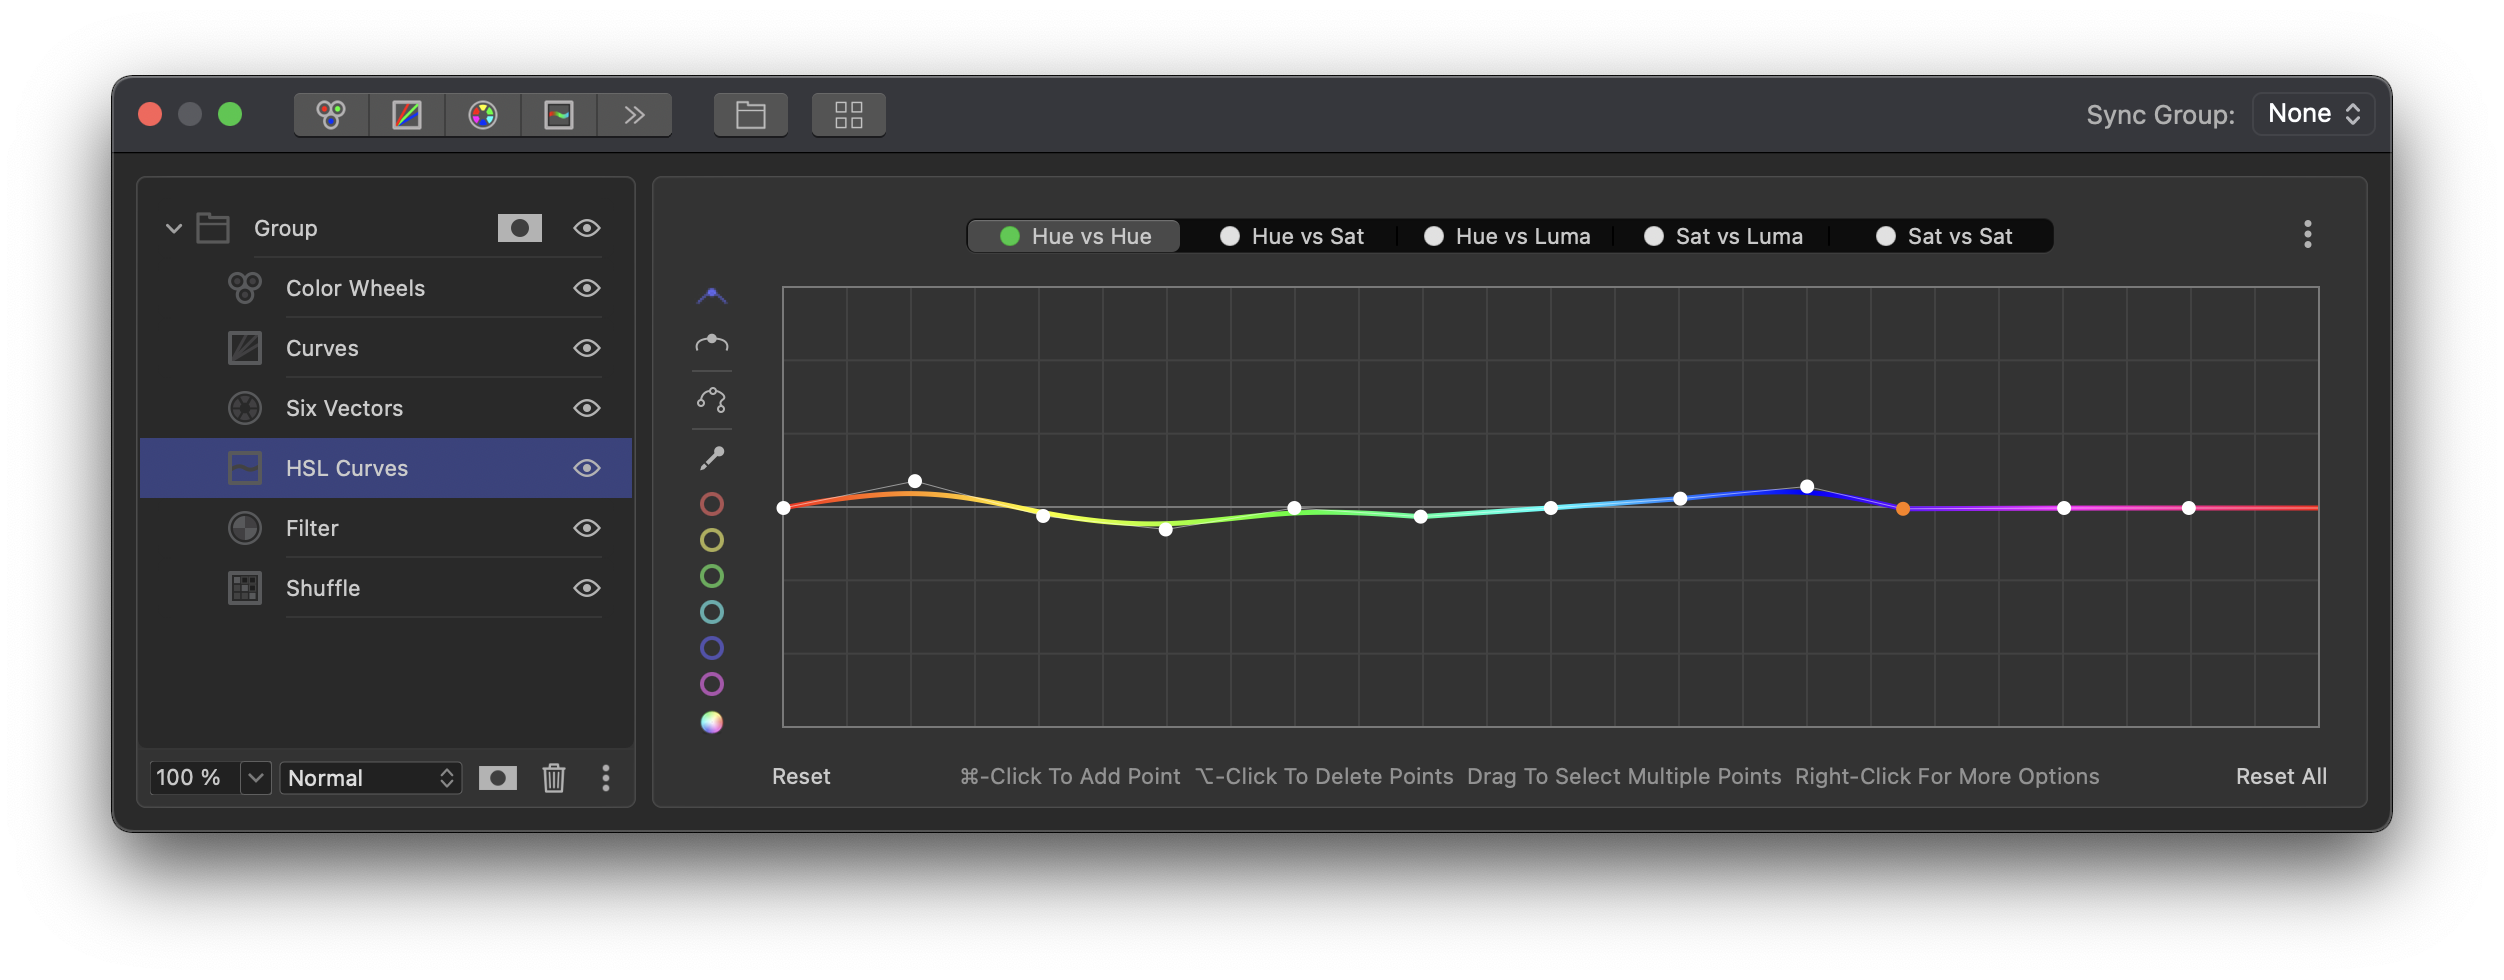
The HSL Curves tool (hue, saturation, luminance) can be used to further sculpt your color grade. This tool includes five panels – Hue vs Hue, Hue vs Sat, Sat vs Luma, and Sat vs Sat. In the versus concept you are adjusting one item in relation to the other. You can select multiple control points along any of these curves. This tool also includes an Extended Mode setting like the Six Curves The Color page is the heart of DaVinci Resolve. Within the Color page are all of the controls available for manipulating color and contrast, reducing noise, creating limited secondary color corrections, building image effects of different kinds, adjusting clip geometry, and making many other corrective and stylistic adjustments.
Saturation: Using sat and lum curves
文章浏览阅读1k次。调色页面:曲线Color:Curves曲线是重要的调整颜色和对比度的工具。有时有些区域分界线不明显、区域形状过于复杂或者想要选中区域中某个特定的颜色,使用曲线Curves调板会非常方便。_davinci resolve 曲线工具详解:提升色彩与对比度调整的艺术 An in depth look at the secondary curves in Davinci Resolve (HSL curves) Let’s have a look at the curves people tend not to use in Davinci Free One hour Color Grading Training: https://bit.ly/2wdU3Kb Must follow me on Instagram for ?content everyday / theqazman Free LUT Pack: https://bit.ly/2tJ3gsz In this tutorial, you will learn
3. You can always add this step to complement the methods above: In Custom Curves, Hue vs Sat, increase sat (the entire horizontal line or a specific color. In Hue vs Luma, do the opposite and bring the Luma down. 4. HSL + HSV technique. Mute channel 1 & 2 in each node (right click, channel, select and disable). It’s part of their business model to sell you hardware. With that said, their panels are absolutely stellar in quality and usefulness. They make you at least twice as fast. There are ways to hack your way around that. I’ve programmed a Streamdeck to control the Hue vs. hue and Hue vs. Sat curves, with the help of Keyboard maestro. One button cycles the main In this tutorial, we will be discussing about Sat vs Sat Curve in Davinci Resolve #davinciresolve #davinciediting #davincivideoediting Learn the basics of using Davinci Resolve including how to
Hue vs Sat controls the saturation of a particular hue. Say you want to make the reds in your shot more saturated than other hues, you’d use this tool. Lum vs Sat controls the saturation of the image based on luminance values: highlights midtones and shadows. The training program for Resolve mentions removing color casts from shadows with this tool for example. It’s important With all the other curve adjustments (like Hue vs Hue and Hue vs Sat) everything work just fine. I know that there are other tools like the qualifier separation, but I think the Hue vs Lum curves would be very useful in many situations (like I This makes curves adjustments easier, more specific, and a more consistent experience, no matter what your workflow happens to be. Adjusting Curves Using the Mouse All Color curves in DaVinci Resolve use the following controls for basic on-screen adjustment using the pointer, controlled either with your mouse, pen, or other input device of choice.
Learn how to color grade using the hue vs tools in DaVinci Resolve, enabling you to do things like change specific colors, dial in skin tones, create an overall look, and more. These tools are The Custom curves seen used to create a gentle “S” curve adjustment with four additional control points added The Custom curves are useful for making more tonally specific, channel-by-channel adjustments to an image than can be accomplished using the Color Balance controls.
In this episode we take an in depth look at the hue vs hue curve in the color tab of Davinci Resolve. Buy Me A Coffee: https://www.buymeacoffee.com/filmresomore
However, if you turn Custom curve ganging off by pressing the GANG soft key, then these controls only affect the curve you select using the LUM CURVE, RED CURVE, GREEN CURVE, and BLUE CURVE soft keys. You also have the option of using the fourth trackball from the left to adjust individual control points on curves to any position you like. Exploring Resolve’s Color Boost and Saturation controls by tracing saturation curves on the waveform using a custom DCTL.
Using the Lum vs. and the Sat vs. curves
In this episode we take an in depth look at the Sat vs Sat curve in the color tab of Davinci Resolve. Be sure to subscribe for more discussions, tutorials, t
- Bundesregierung Will Sexuell Übertragbare Infektionen Eindämmen
- Budni Budnident Zahncreme Kräuter Im Test: 1,1 Sehr Gut
- Bullet Journal, Travel Journal, Sketch Journal
- Bujar Merdanaj Restaurant Da Bujo In Stade 21680
- Buffet In Seychelles | Exquisite Dining Experiences
- Bundesnachwuchschampionat 2024
- Buffon, Schmeichel Or Yashin? Top 10 Goalkeepers Of All Time
- Building Complex Forms In Angular With Nested Form Groups
- Bundesstiftung Baukultur: Max-Brauer-Preis
- Budapesti Laptop Szerviz, Notebook Szerviz, Bga Golyózás
- Buddychat Flexible Nackenbügel-Halterung Für Buddychat